First, get your computer set
up.
- Save the .zip file called MPFI_Adj_10x20_Installer.zip that is attached to this email to the root directory of your C: drive ( that is C:\ ). DO NOT DELETE THIS FILE AFTER INSTALLATION. PRESERVE IT IN THE EVENT THAT YOU NEED TO REPEAT THE INSTALLATION.
- Unzip the ZIP file named MPFI_Adj_10x20_Installer.zip that was sent in the email. Unzip all contents to the root directory of your C: drive (that is C:\ ).
- Use Windows Explorer to view the files in directory C:\
- You should see a file called MPFI_setup.bat
- Double click on this .bat file to install the software.
- This .bat file will build a subdirectory called C:\MPFI_Adj_10Rx20C on your PC and move the appropriate files into it. After this .bat file runs, it cleans up unnecessary files from the C:\ directory that were temporarily installed by the zip file extraction.
- Using Windows Explorer navigate to this C:\MPFI_Adj_10Rx20C folder or subdirectory.
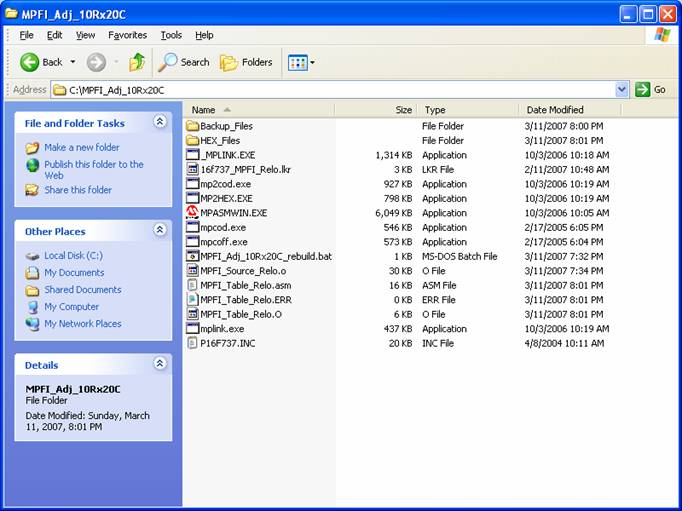
- The contents of this folder should be:
- MPFI_Adj_10Rx20C_rebuild.bat
- MPLINK.EXE
- _MPLINK.EXE
- MP2HEX.EXE
- MPASMWIN.EXE
- MPCOFF.EXE
- MPCOD.EXE
- MP2COD.EXE
- P16F737.INC
- MPFI_Source_Relo.o
- MPFI_Table_Relo.O
- 16f737_MPFI_Relo.lkr
- This .bat file will also build a subdirectory called C:\MPFI_Adj_10Rx20C \HEX_Files on your PC. The HEX files that get built into it.
- After you use the Excel file to create test files you can use the Windows Explorer navigate to this C:\PIC_Projects\HEX_Files folder or subdirectory.
- The contents of this folder should look like this:
- MPFI
- MPFI.hex
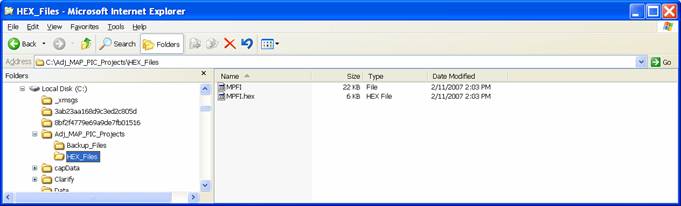
- The .hex file is the file that you need to program the ACM using the programmer.
- You can rename this hex file to a filename that is meaningful to you by right mouse clicking on the file name and choosing Rename from the popup menu.
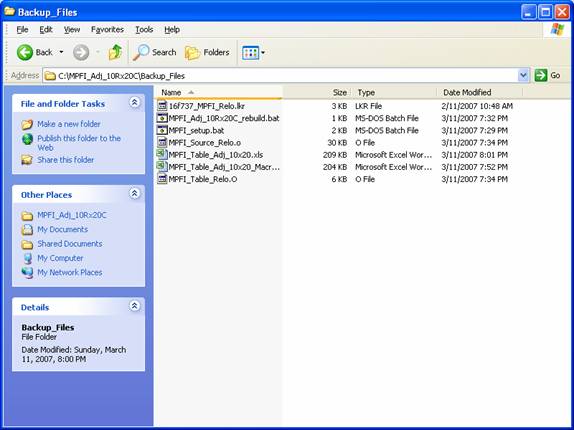
- The installer will also create a backup directory called :\MPFI_Adj_10Rx20C \Backup_Files to preserve several master files in case you accidentally delete them from the C:\PIC_Projects folder. This folder will contain the following backup files (as pictured below).
- MPFI_Source_Relo.o
- MPFI_Table_Relo.O
- 16f737_MPFI_Relo.lkr
- MPFI_Adj_10Rx20C_rebuild.bat
- MPFI_setup.bat
- MPFI_Table_Adj_10x20_Macro.xls
- MPFI_Table_Adj_10x20.xls (may not appear in listing)
Next,
here’s how to update the hex file with new table information.
- BEFORE YOU PERFORM ANY OF THE FOLLOWING STEPS,
MAKE SURE THAT THE ANALYSIS TOOLPACK ADD-IN IS INSTALLED IN EXCEL. THIS PROCESS WILL NOT WORK WITHOUT DOING
THIS. FROM THE
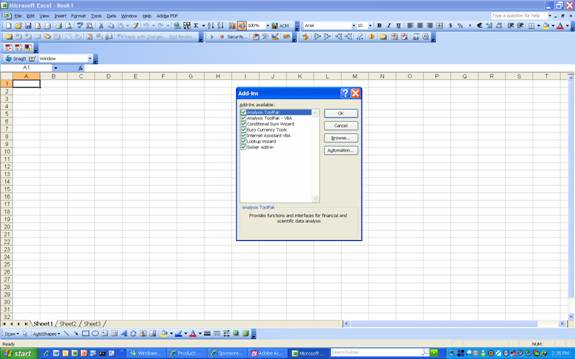
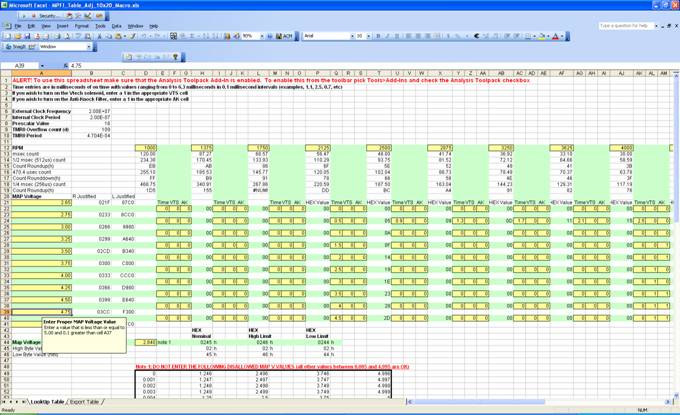
- Use the Excel spreadsheet to modify the values that you wish on the spreadsheet Lookup Table tab, remembering to set all the VTS and Anti-Knock cells. Failure to include a value for every cell will result in unpredictable results.
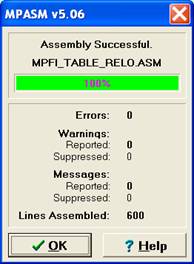
- When you are done building a table that suits your needs, click on the ACM button pictured in the center of the upper toolbar. If everything builds correctly you should get the screen below. Click OK.
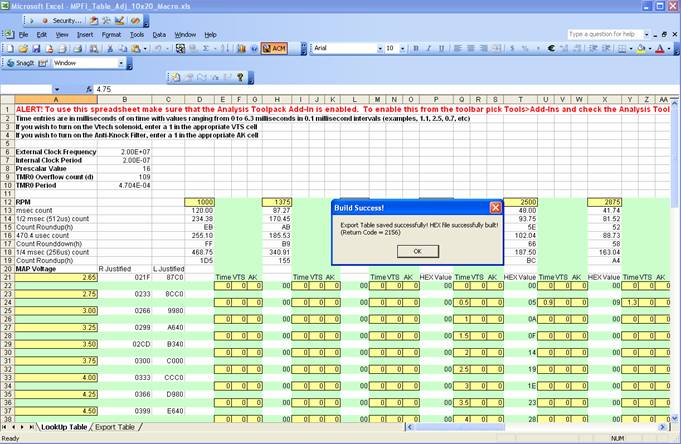
- This will automatically build the corresponding hex file and store it in the C:\MPFI_Adj_10Rx20C \HEX_Files folder. You will see a dialog box as below when this succeeds. Click OK to continue.
- You should rename the HEX file named MPFI.hex to a filename that is meaningful to you by right mouse clicking on the file name and choosing Rename from the popup menu. Make sure you keep the .hex suffix or the file will not work. If you don’t change the file name, the next time the process above is run, it will overwrite the previous contents of this file.
- The .hex file is the file that will get programmed into the MPFI controller using the programming procedure provided in a separate procedure.